

Secure sharing in Keeper works by encrypting records with record-level encryption keys, enforcing granular permissions and giving administrators centralized policy control and audit visibility into how
2 min read
Published on February 18, 2026
Keeper’s passkey management works by letting you create, store and use passkeys directly from your Keeper Vault so you can sign in with biometric or device-based authentication instead of traditional passwords. By removing shared secrets and replacing them with cryptographic credentials tied to your device, Keeper makes signing in faster, more secure and resistant to phishing attacks.
As passkeys become the new standard for authentication across consumer and enterprise applications, Keeper provides a centralized and secure way to manage them alongside traditional passwords, secrets and other critical credentials.
In this blog, we’ll explain how to create and manage passkeys step by step in Keeper.
What is passkey management in Keeper?
Passkey management in Keeper refers to the ability to create, store, organize and use passkeys directly from the Keeper Vault. Instead of relying on passwords that can be reused, stolen and are susceptible to phishing attacks, passkeys use public key cryptography and are unlocked with biometrics or a device PIN.
With Keeper, passkeys are securely stored in your zero-knowledge vault, automatically associated with the correct website or app and made available through KeeperFill® when you need to sign in.
How to create and manage passkeys in Keeper
Creating and using passkeys with Keeper is designed to feel simple and intuitive. Below is a step-by-step walkthrough of how to create and manage your passkeys in Keeper.
Step 1: Open a supported website or app login flow
Navigate to the account settings of a website that supports passkeys and locate the option to create a passkey.
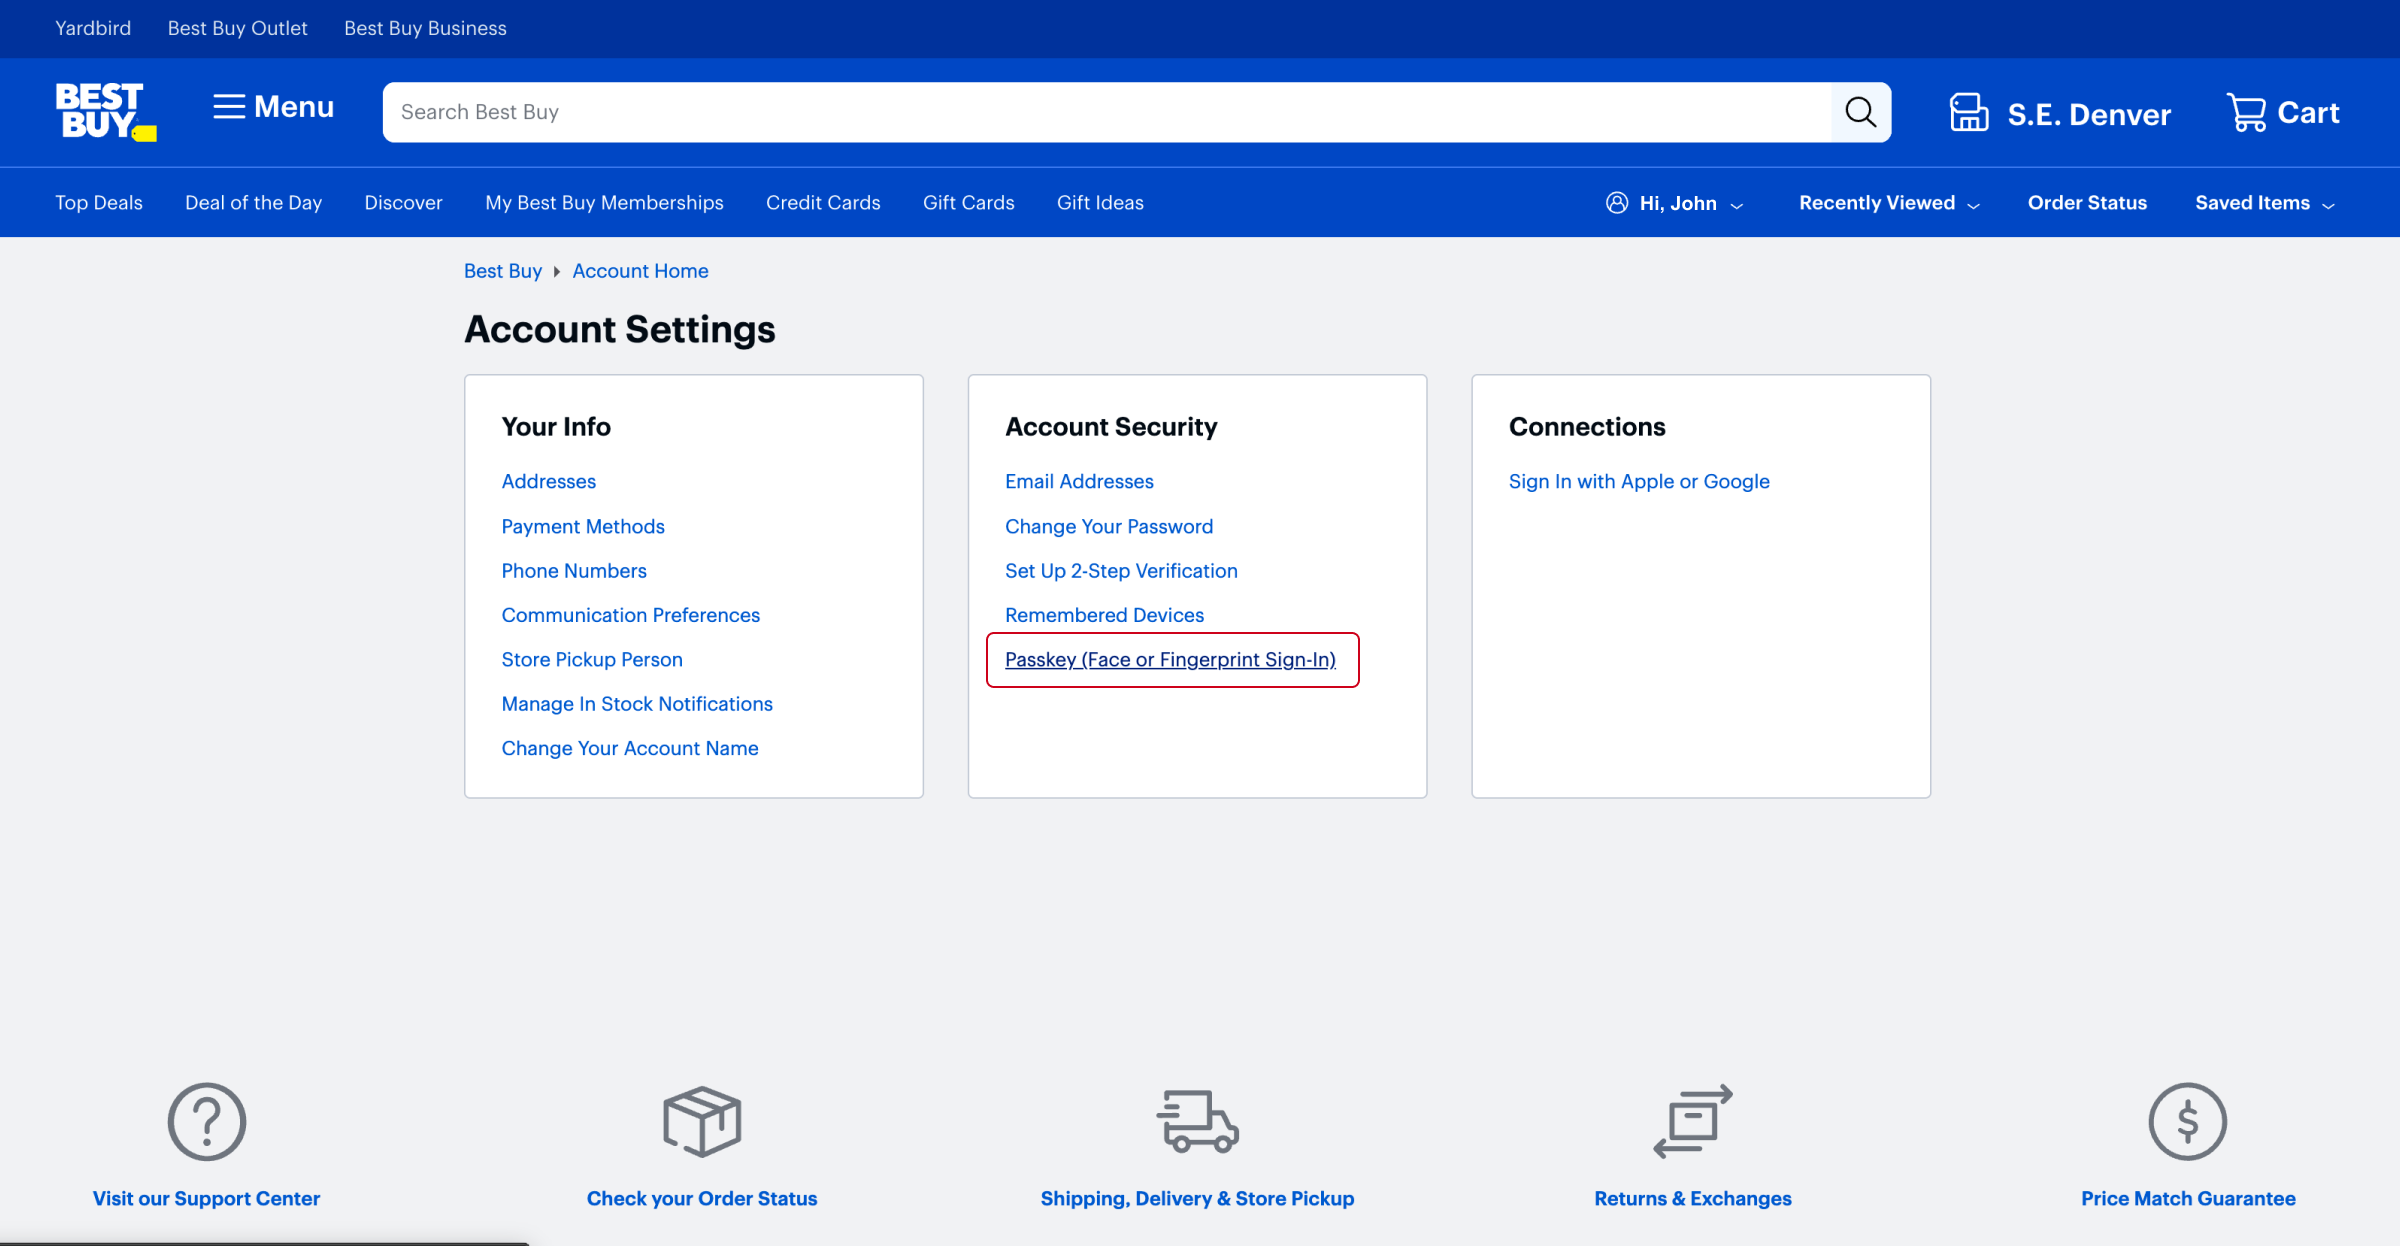
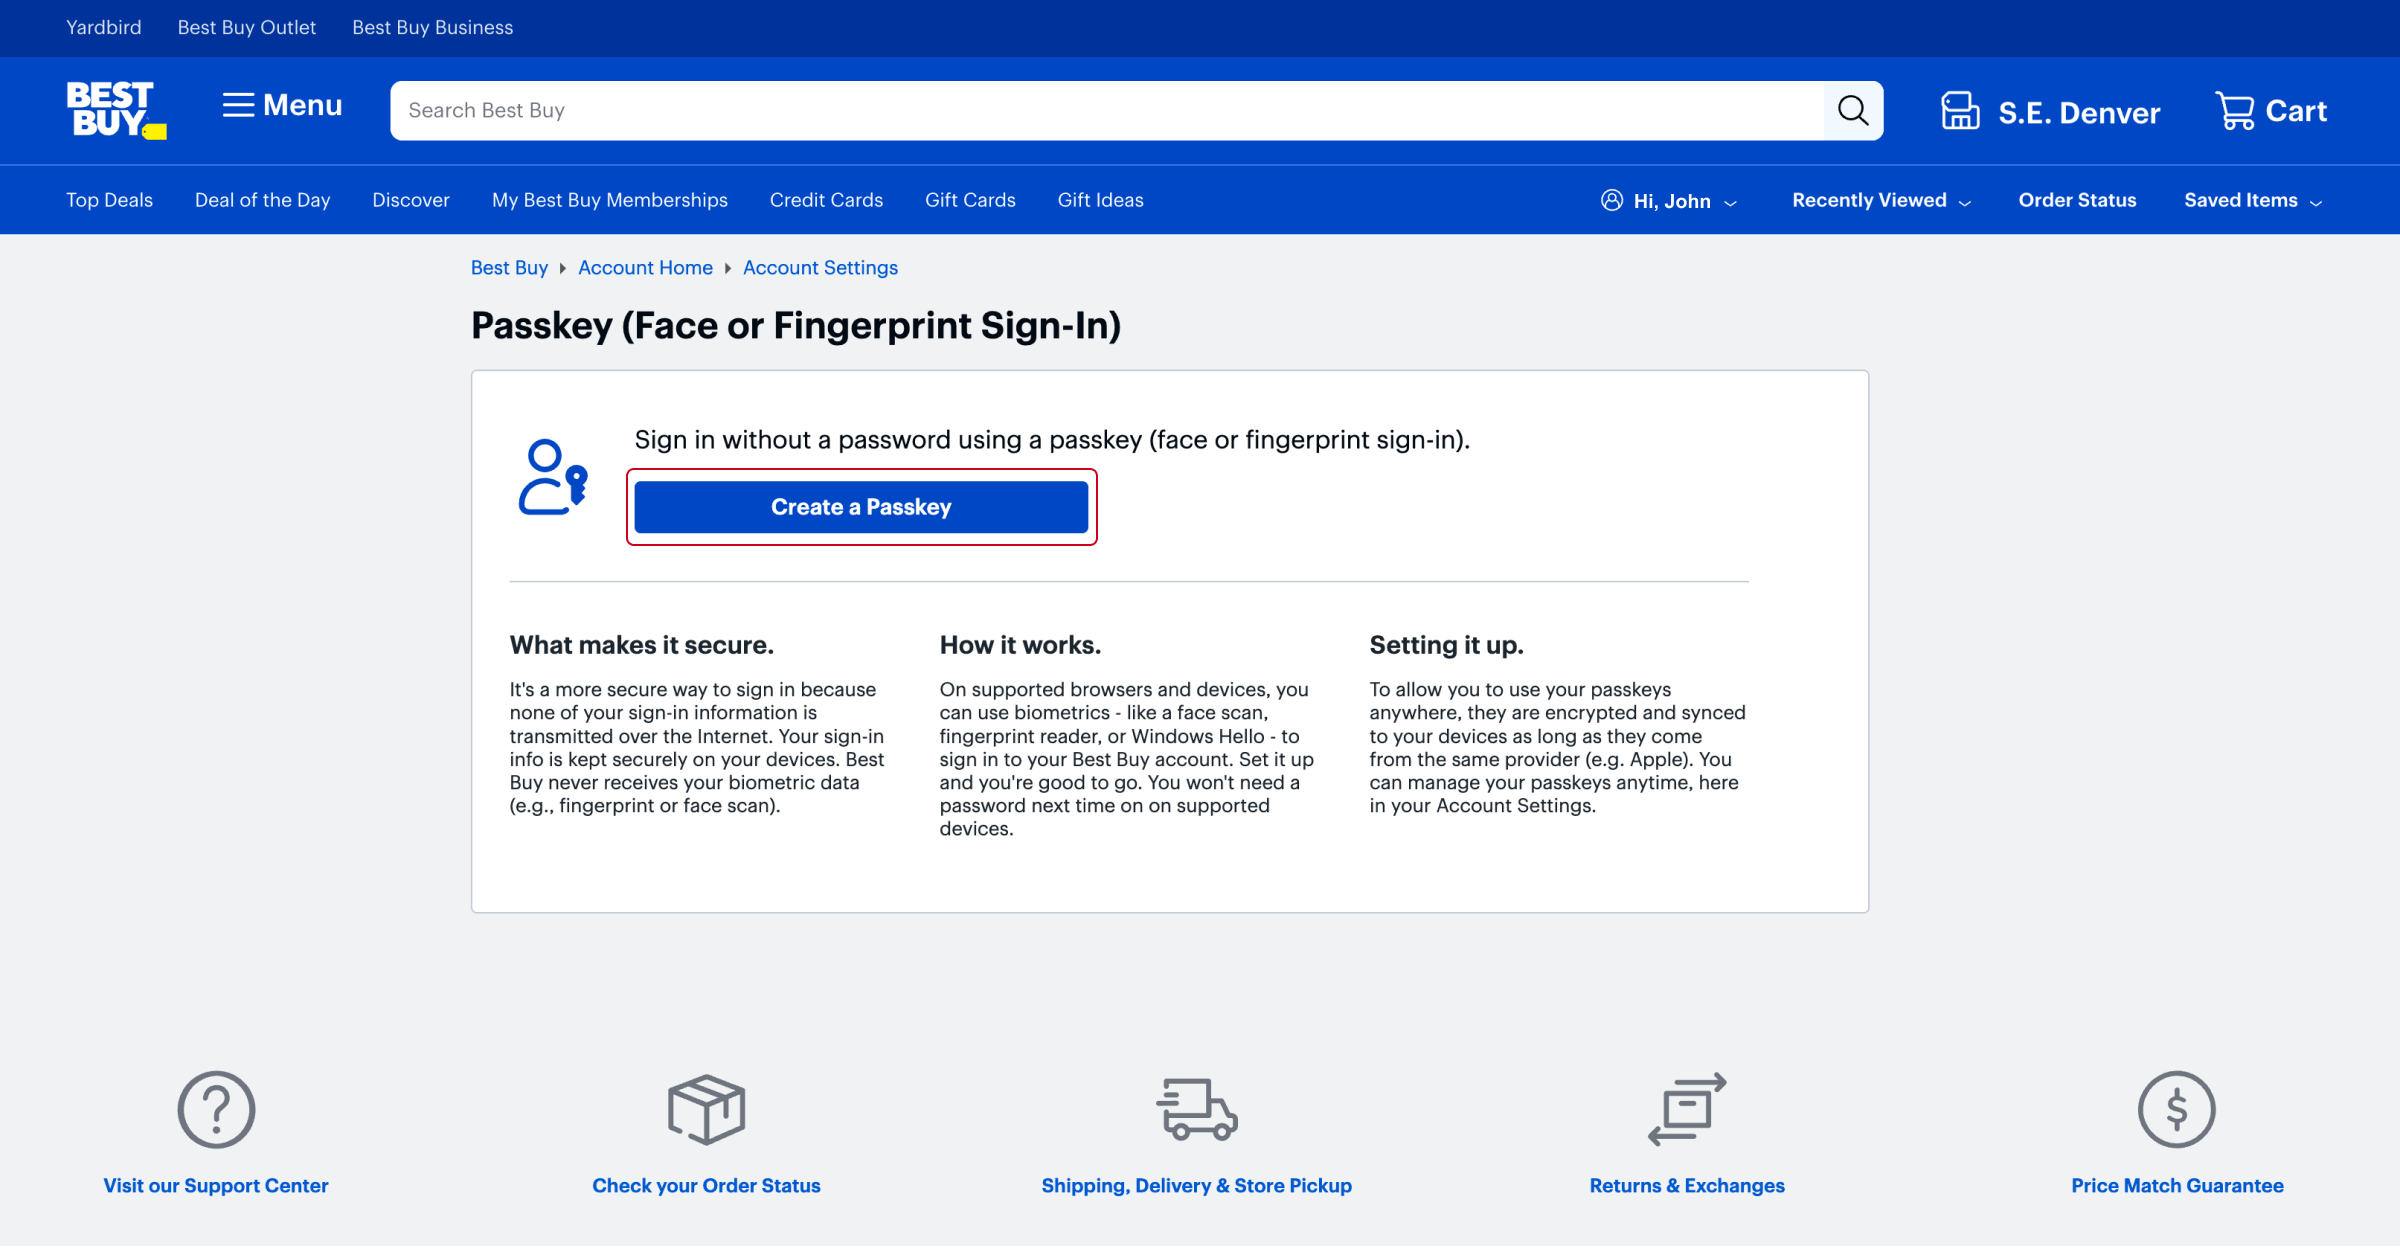
Step 2: Choose “Create passkey”
Click the “Create passkey” button or equivalent option provided by the website.
At this point, Keeper intercepts the request through KeeperFill and prompts you to save the passkey to your vault.
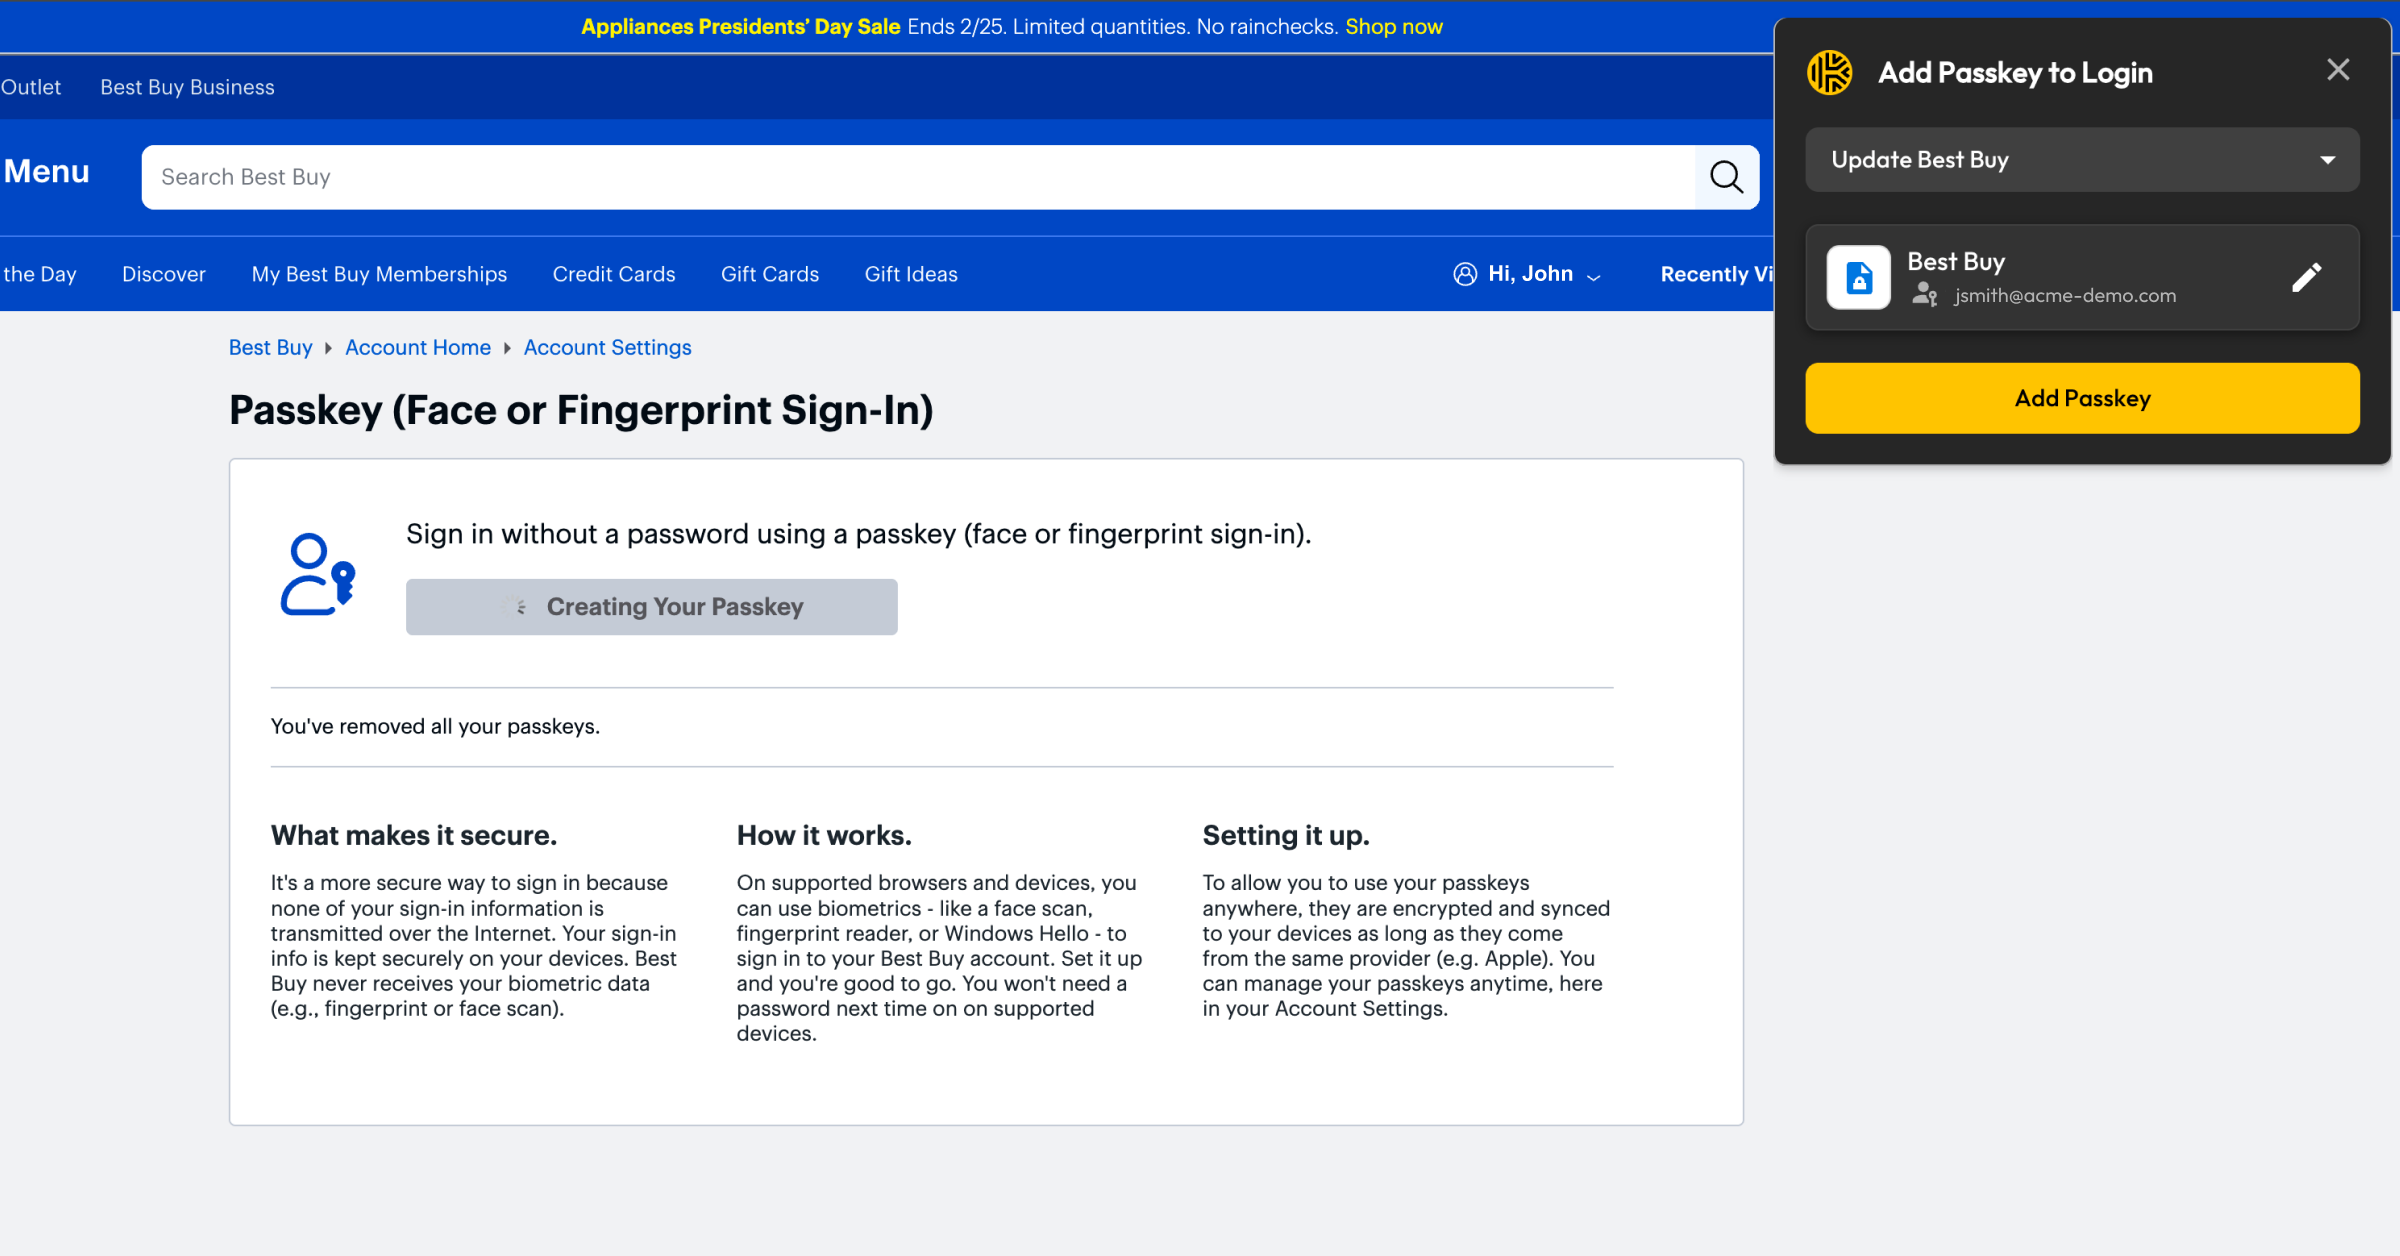
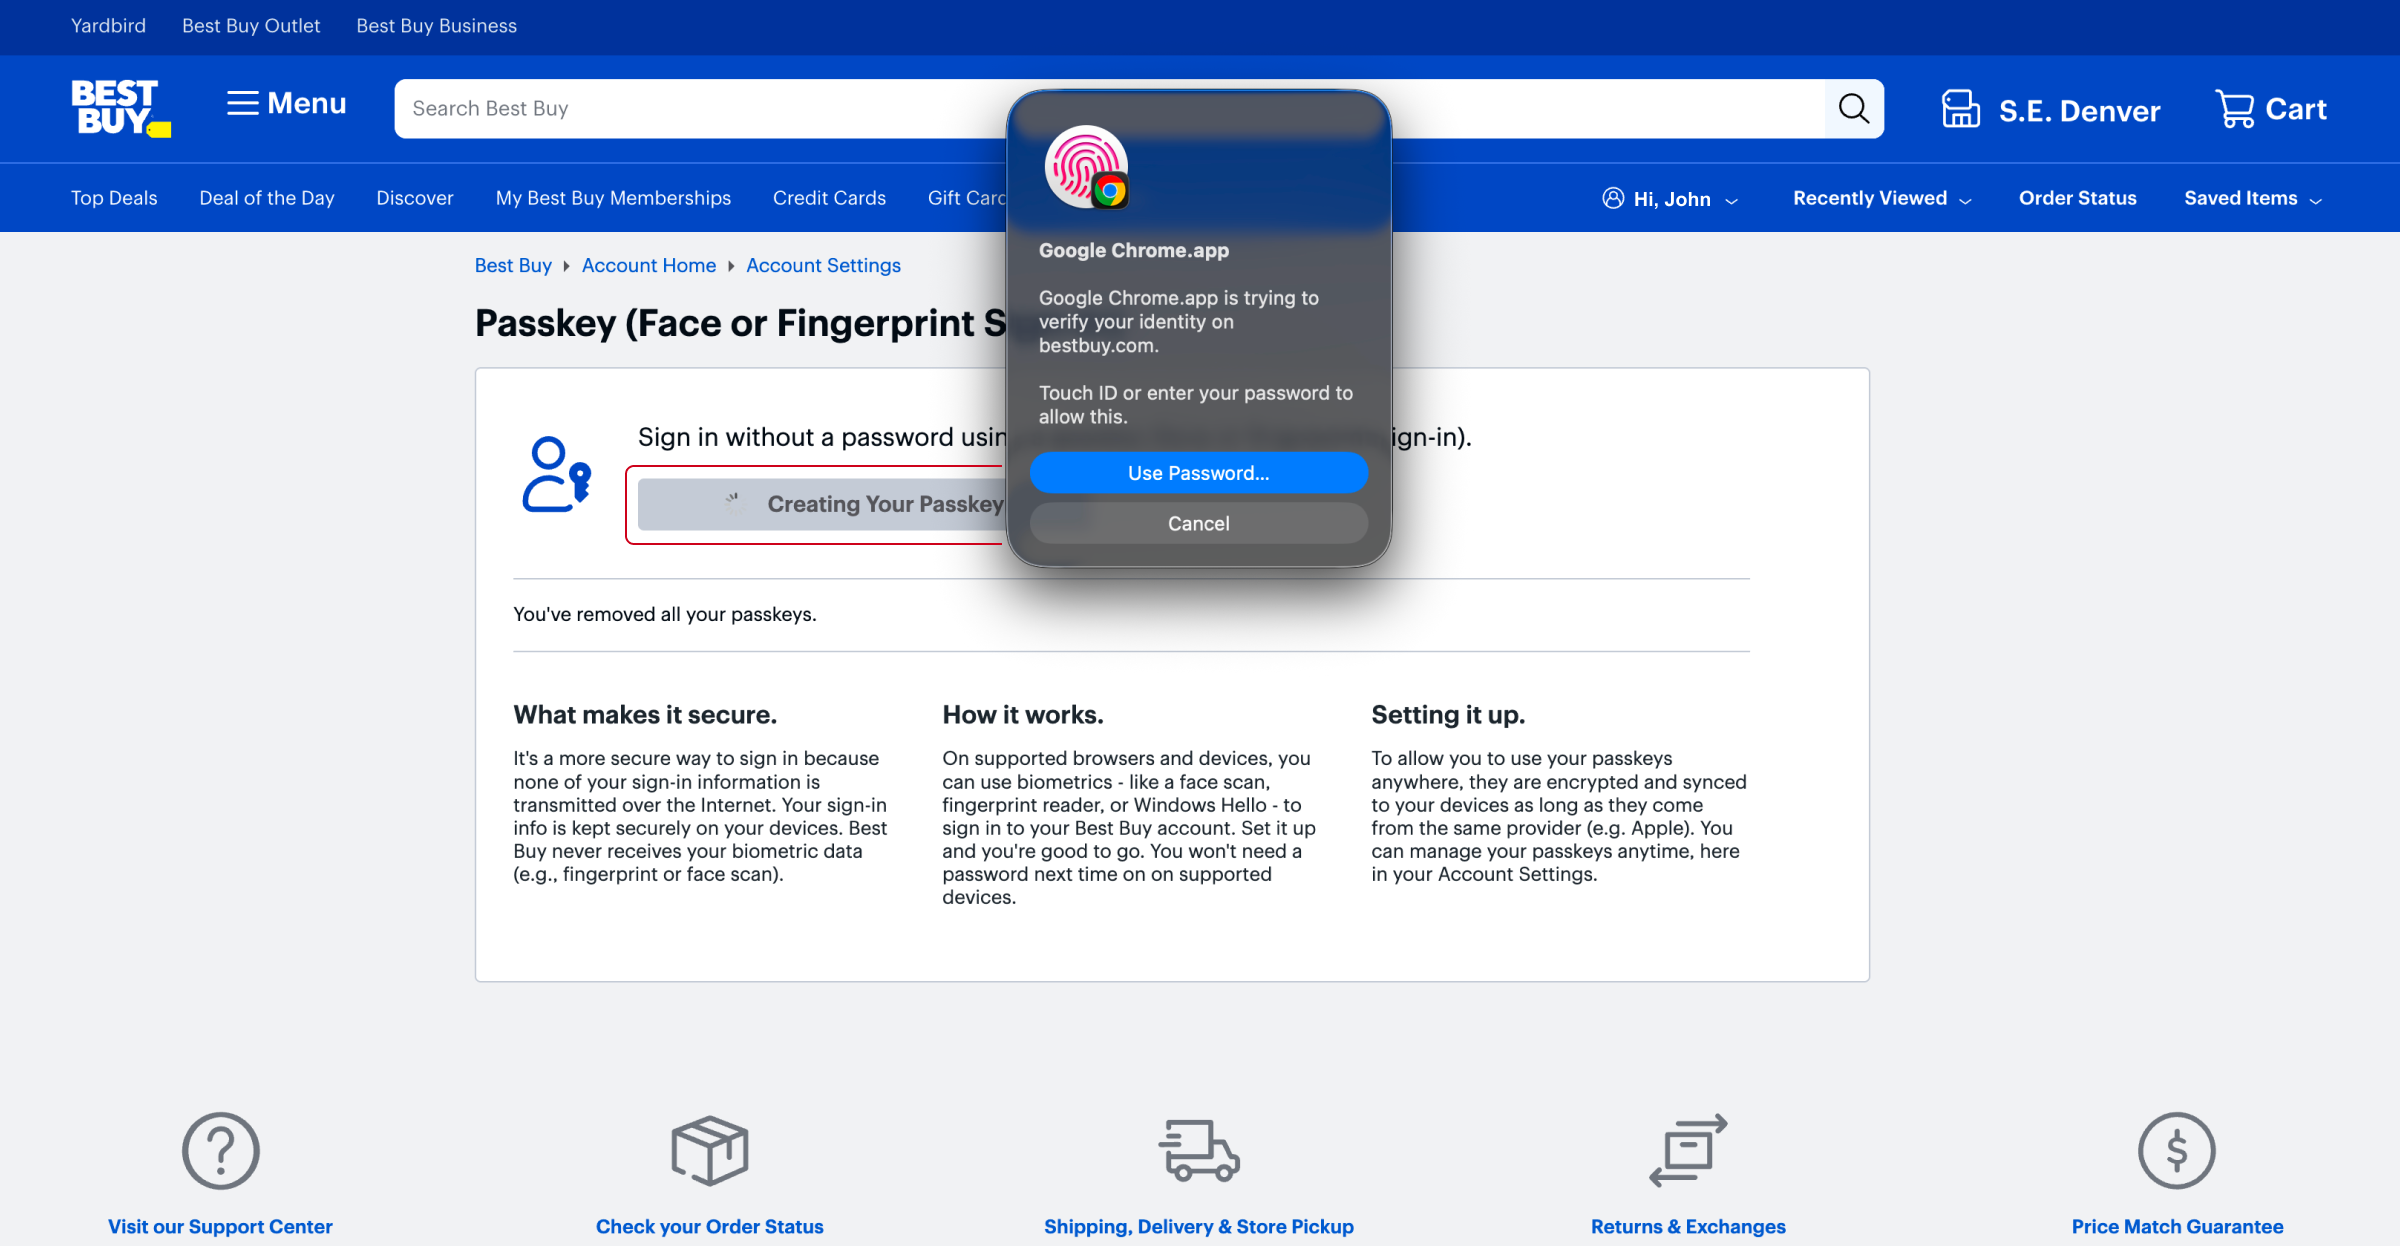
Step 3: Confirm biometric or PIN on your device
Verify your identity using your device’s biometric authentication or PIN. This step ensures only you can create and use the passkey.
Step 4: Save the passkey to Keeper
When prompted, confirm that you want to store the passkey in Keeper. The passkey is encrypted and stored in your vault. Once saved, the passkey appears as a field within a Keeper record.
Each passkey record includes key metadata such as:
- Date the passkey was created
- Username associated with the account
- Relying party, such as the website or application
Passkey records can be organized into folders, managed alongside passwords and securely shared with other users when appropriate.
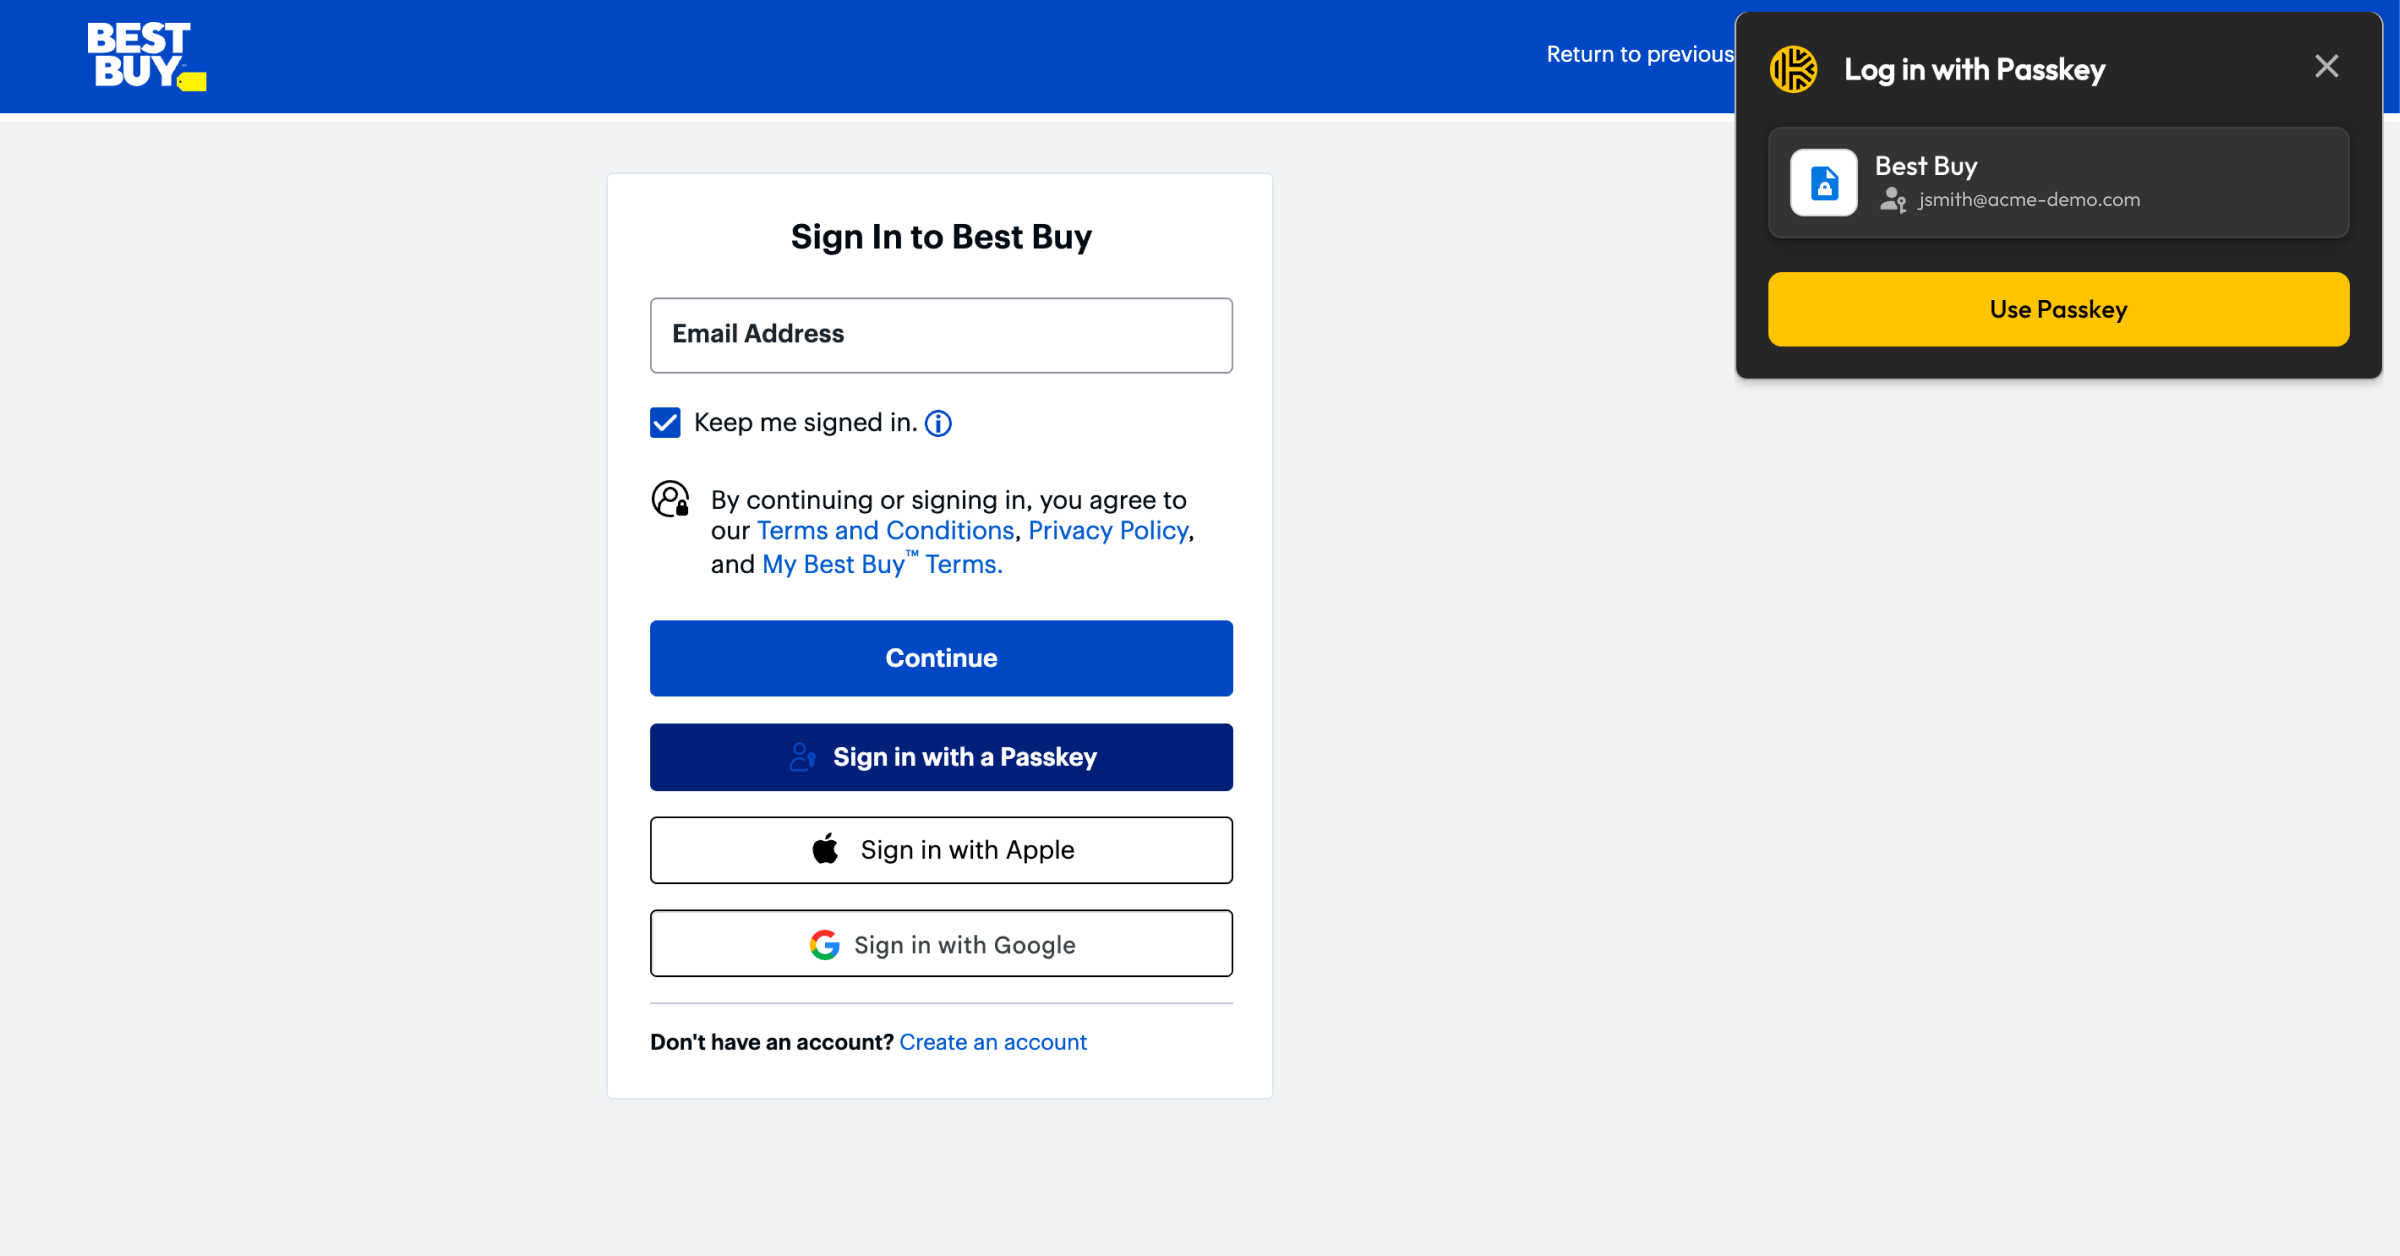
Step 5: Log in with a passkey using Keeper
When you return to a website that supports passkey login, select Sign in with a passkey or a similar option. KeeperFill will detect the request and prompt you to use the stored passkey.
After confirming biometric or device authentication, you’re signed in instantly without having to enter a password.
Get started with passkey management in Keeper
By managing passkeys in the same vault as your passwords, Keeper helps users and organizations transition to passwordless authentication with confidence.
Try passkey management in Keeper today and see how effortless secure authentication can be.
